Wednesday, November 30, 2016

project 6

materials: paint (color of your choice)
Foam board
ball of yarn
For this project I used a foam board and three different color paint tubes. I used a ball of yarn and dipped it in one color of paint and held the yarn at eye level and drop it on the board. I repeat this action until the paint is gone. I then let the first layer dry then I begin the same process with another color. using this process i was able to get a very cool layered look also a very textured look because of the yarn. After Finishing I noticed the board taking on another shape. It began to curve after all of the paint dried. This reaction brought the project a little more alive than it was before. I think that continuing this process a few more time would give it a different and amazing look, giving it more depth, texture and more character.


Project 6- Ally Bertling


Performance Art: Twine Painting
Materials:
-          16X20in Pure White Art Board
-          -Twine
-          High Flow Acrylics: Cerulean Blue
-          High Flow Acrylics: Hansa Yellow Medium
-          High Flow Acrylics: Naphthol Red Light
-          Foam Brush/ Regular Paint Brush
*You can use any colors of paint that you would like for this project*
Instructions:
1)      Choose where you will do the project. (If you do the project inside, lay down a tarp so that you don’t get paint everywhere.)
2)      Start by tying the twine to one piece of furniture/object then tie it to another object. Keep tying the twine to a couple different objects until you are satisfied with the design the twine makes in the middle between all the objects/furniture you tied the twine to.
*Make sure to keep the twine low to the ground*
3)      After you have finished tying the twine around the objects/furniture you chose. Lay the art board underneath the desired area of twine.
4)      Now take your first color of paint, I used my blue first; Start to apply the paint to one of the strands of twine that is above the art board.
5)      Now use your fingers (If you don’t want to get paint all over your hands, you can use gloves) to pull the twine up and then let go of the strand, so that the paint hits the art board making a line and some splatter and repeat with the same strand to make the color appear a bit darker or until desired result.
6)      Take your second color of paint, I used my red next; Apply the paint to a different strand of twine that is above your board.
7)      Use your fingers again to pull that strand of twine and let go to make the paint hit the board making another line and repeat a few times to make the color appear a bit darker or until desired result.
8)      Take your third color of paint, I used my yellow next; Apply the paint to a different strand of twine that is above the board.
9)      Use your fingers again to pull that strand of twine and let go to make the paint hit the board making another line and repeat a few times to make the color appear a bit darker or until desired result.
*You can use any colors that you want to use for this project*
10)  Keep repeating steps 4-9 with all you colors to the rest of the strands of twine that covers and is above your board until you are satisfied with your results.


Project 6: JUAN P. TORRES

Materials:
Bristol Board
Paint brushes
Cup with some water
Some gouache paint (vibrant colors work best)
Black spray paint
Crumpled paper
Music (optional)

Instructions:
Set up all your materials on your work-space. Be prepared to be focused and have a good memory while working. Close your eyes and place your fingers on them with a bit of pressure (don't hurt yourself) you'll have to remain calm and focused for about 15 seconds, soon vibrant colors will appear and whatever you perceive through imagination you paint, imagination and memorization skills are critical, so you must work fast. Music helps set the mood. Once you have developed a vision you add a shade of black to represent a background of darkness that exists through lack of vision. Lastly, you use a crumpled piece of paper and dab it while spray paint is still wet to add texture to the background.

Reflection: I needed to come up with a strange creative idea, although it was done in less than a day it' s a simple project that anyone can try if they have the proper materials and time. I feel like this project represents me in the aspect of imagination, most work of mine is inspired by visions i have or images i process in my brain. I really enjoyed doing this one because the thought just sparked from trying to come up with something different. It didn't stress me at all. I had other things in mind but this one was simple and quite easy to achieve. Sometimes its best to stay mellow and just progress with what you got to work with. Luckily i already had all materials i needed to perform the task, so i was just trying to focus on replicating my vision on a bristol board. I would change the fact that i only did one composition, feel like it would work better if i had taken about a week and had a series of hallucination visions recorded as art, i'm satisfied with the way the final piece of work turned out.


Tuesday, November 29, 2016

Project 6: Reflections


In order to complete this project the artist would simply need a disposable camera, artist tape, a few minutes twice a day and their room. First I would advise putting down "x's" as pictured above on the floor right outside the door of the artist room. The reason being is because we want to make sure we take the photo from the same spot everyday. This project is almost meant to be an experiment, so all variables must be constant except for the inside of the room. Therefore I tried to take the photos at 10 am and then again at 10 pm. So the artist should also pick times that work for them in order to truly execute this project correctly. Although, it's okay if its not possible completely to get it at the exact same time everyday. The duration of this project can really be as long as the artist wants it to be for time purposes mine was roughly 10 days. Yet really for the best results I think this project should be done over a month long period. As far as putting this project together, I think it is important that the morning photo is connected to the corresponding night photo by the photo film. It helps the viewer of the piece to read it. Then where the artist wants to install the piece is up to them, I opted out for a spare mirror I keep in my room. I then chose to place it on my bed because I feel like that part of my room truly reflects the most of my personality. 
I came up with the idea for the project because I had recently been diagnosed with Bi-polar. It's a mental disorder that runs pretty strongly through my family so it's one I'm familiar with. I've been extremely fortunate however in the support that I have had, a luxury some don't have in my situation. Yet that doesn't mean that I don't struggle myself to understand exactly whats going on. Sometimes I'm not even sure how to decipher my own feelings. Although after hearing a lecture in my psych class about how rooms reveal personality traits; I began to wonder if maybe the same was true for my bi-polar. I thought that maybe I could record my mania and depression through the lens of my disposable camera simply by snapping a photo of my room. I wanted to see if other also could see the same emotion portrayed or if they saw any at all. Maybe some people only see a mess. At first I thought that if my room was messy I was depressed. I thought it meant I just lacked the care for my own environment due to fatigue or lack of interest. Yet as I paid more attention to myself because I was actively thinking about my room everyday I realized my thinking was wrong. My room isn't always messy it goes through short bursts of cleanliness but it never last cause I am constantly doing things and taking things out and then i get too distracted to put them away. I also realized I attempt to clean my room everyday but I tend to get distracted by a different task. Not being able to focus is a key trade mark of mania. This was a really interesting project for me because it helped me to discover things about myself. I truly believe rooms are reflections of ourselves and they are such personal spaces. I really believe even if the observer doesn't appreciate the work or "doesn't get it", the artist will because they will discover something new about themselves. I think this is one of those projects that is personally done with the artist in mind and not really the audience. Overall I really found this to be a fun project to do because of all the thinking it made me do. 

Monday, November 28, 2016

Project 6n - Julian Chastang


Materials:
Large surface to paint on(In my case it's a sheet of drywall.)
7 cans of spray paint(each a different color for each day of the week)
Instructions:
1. Cut drywall down to a manageable size.
2. Select a can of spray paint for the designated day of the week.
3. Spray a line on the drywall for when you leave home.
4. Hold down the spray button for seven seconds to leave a dripping circle to mark when you came home.
5. Repeat steps 2-5 with a different color of spray paint for every other day of the week.
For this project I decided to use a sheet of drywall and seven cans of spray paint to make this composition. I would have liked to have done something more complex, but I didn't want to make it too difficult and go against the project instructions. I thought it was kinda interesting to finally get some use out of the cans of spray paint sitting in my room.

Project 6

River Flows In You 


Materials :

  • At least three different colors of acrylic paint
  • Chalk pastel (2-3 colors)
  • Xacto knife
  • Bristol board
  • Artists Tape
  • A song of your choice which you will be playing on the piano.
  • Foam board
Instructions:
  1. First practice the song you will be performing a couple times. Take the measurements of the piano and count all the white and black keys. Then cut out the keys from the Bristol board.
  2. apply a piece of artists tape on the back of cut Bristol board pieces and tape them onto the piano. 
  3. On a separate sheet of paper empty the chosen acrylic colors and dip each finger into a different color. Now play the song on the piano , and allow to dry overnight
  4. The next day repeat the same process but this time you will take the pastel chalk sticks and powder them down with your xacto knife. 
  5. Place your fingers in different colors and play the song again .
  6. You now have your completed project. Gently remove the pieces of cut Bristol board and place them onto foam board. Any layout design would work with this project.

I Chose the song River Flows in You by Korean pianist and composer Yiruma. It is a song i have enjoyed listening to for a while. I also decided to change my color palette for this project and went with cooler tones.The blue colors i chose reminded me of water colors ,which i thought suited the title of the song.I also chose this layout design because i wanted the viewer to be able to see the original piece on a simple display.The black foam board was cut out in that pattern because I wanted it to resemble the keys of a piano. I really enjoyed working with this project because it creates a random outcome . It is interesting that each time a different song is played and different colors are used , a new  and original piece of art is being created. I have always wanted to visually interpret music and i think this project allowed me to do it beautifully.


Project 6-Colleen Rothe

Process:


Final Project:


Ft. my ugly and messy basement


Close Ups 


Materials:

  • 24' 6" roll of white paper
  • 24 washable markers in various colors
Process:
  • Roll out the paper and markers
  • As people pass by invite them to trace and decorate their hands
Reflection: 
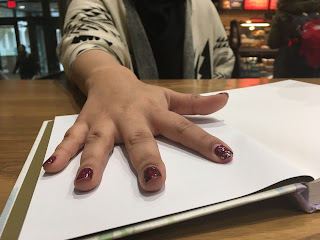
For my project my friends and I went to Youmacon at the Ren Cen and Cobo Hall over the first weekend in November. I really wanted to involve other people with my project and I thought Youma was the perfect place because there's so many people and everyone is very friendly. I chose the Cobo center because it gets a lot of foot traffic and it has long halls that allowed me to roll out the paper as far as I needed to. Another good thing about the Cobo and choosing the day I did was there was a Red Wings game so people outside the con could participate too. I'm really glad people were so eager to trace their hands and decorate them or write funny things, it was a lot of fun watching people. There was some kids at the Cobo center too so they were very excited to draw on the paper. There was one boy dressed as Charazard (Pokemon, see pictures above) and he explained how he turned his hand into Charzard, it was very cute. Overall I really enjoyed this project, it was a lot of fun to make and it was cool to see everyones projects because they were so different and unique. I'm going to keep my project and I might even do it again at other conventions I go to (just for fun). 

Project 6 - Emilia Nawrocki


Materials

  • makeup
  • makeup wipes
  • sewing needle
  • white thread
Instructions
  • apply makeup for the day
  • at the end of the day, take off the makeup with a makeup wipe
  • once you have a good amount of makeup wipes, choose the size of your groupings (I did groupings of four) and use your thread and needle to stitch the makeup wipes together
  • you are done
Process and Results


Project 6 number two

Materials
  • bristol board (size of your choice)
  • ink pens
  • desk
  • things you frequently put on your desk
Instructions
  • tape the piece of bristol board to an area of your desk
  • whenever anything is placed on the bristol board, trace it with the ink pens
  • art is made
Project 6
By Feza Ali


The instructions for the project is that any person I have a conversation with I would ask them to stamp their fingerprint. The palm of the hand would be placed in the middle of the page and would stamp the print wherever the finger would land.  For each day of the week was a finger of the right hand. The interaction has to be a conversation. After they put their fingerprint I would right their name next to it  with a black sharpie. I alternated colors and tried to not have a color repeat and I also told them that it was okay for them to overlap with someone else's fingerprint.

It was an interesting challenge. There were someday where I would forget to ask the person and then I would go find them and have them stamp it later. It was also an interesting experience, especially when I would have to explain to them as to why I am doing the project and what the purpose is for me to ask for their fingerprint. Some people were hesitant because they didn't want to get ink on their fingers, but overall, it was a fun and interactive project. 

Sunday, November 27, 2016

Project 6 - Jessie Kim

"Mood Tracker" (tentative name)

Materials:
  • 2 pieces of Bristol board
  • 1/2'' artist's tape
  • gouache paint
  • paintbrush
  • water cup
  • alarm/timer
  • ruler
Instructions:
  1. Figure out for how long you want to keep a mood tracker for. For the sake of this project, I made a mood tracker for 15 days (Nov. 6 through Nov. 20).
  2. Set an alarm on your phone, watch, etc., for any time of the day (for example, 7 p.m.) to remind you to check your mood, record it, and paint a "square day" according to the emotion you are feeling.
  3. Assign the emotions fear, anger, sadness, joy, tiredness, calmness to a color you associate each best with from your gouache paint set. For my project, I matched fear with black, anger with brilliant red, sadness with blue lake, happiness with medium yellow, tiredness with burnt sienna, and calmness with leaf green.
  4. Get 1 Bristol board paper and measure it out. You will discover that it is not truly 9 x 12 inches which makes it really difficult to use rational numbers to create equal "square days". Record the measurements anyway.
  5. Depending on how many days your mood tracker will be for, you will have to create a grid using 1/2'' artist's tape for the borders and the dividing spaces between each "square day." Because I had 15 days, I chose to have 3 rows of 5 squares. I did not chose to make 2 rows of 7 squares because the squares would have been more like rectangles.
  6. Every day at the same time, the time you have set with an alarm, check your mood at that time and record your mood in case you are not able to paint at the moment... (record it anyway even if you do have the time to paint).
  7. The day you prepare your Bristol board should also be a day you record your emotion. So start painting!
  8. Get your paints and the other Bristol board paper to use as a palette.
  9. If you notice that you are feeling a mix of emotions, mix the two colors together!
  10. Paint the first "square day," should be the top left corner square.
  11. Come back the next day and paint the next square.
  12. After the 15th day, wait until the next morning to take off the tape from the Bristol board.
  13. Good morning... time to take off that tape...
    Final product


Reflection
I enjoyed this project because I really like painting and I find the gouache paint medium interesting to work with, especially because of the texture after the paint has dried. I chose to create a mood tracker because I think it is just fun and interesting to see visually and represented in color the emotions I normally experience.